enaml-native provides several ways to speed up development without having to re-build the app every time.
The when creating the Application instance in your apps main.py you can set the dev parameter to:
dev="<ipaddress>" (may be forwarded over adb) dev="server"dev="remote"This article covers what each mode does.
Note: The recommended mode is client mode but server mode is the easiest to get started.
In client mode, you run a forwarding server on your system and the app connects to it. This lets you make changes using whatever editor you like and they will be pushed to the app by the forwarding server.
Note: Only the
srcdirectory will be watched for changes watchdog.
To use client mode and the dev server:
dev="<dev server ip>"enaml-native start in your project folder. If you get errors make sure you have watchdog and tornado installed. You will see:
$ enaml-native start
Entering into src
Watching <path/to/you/app>/src
Tornado Dev server started on 8888
Client connected!
and in the device log
07-22 12:22:39.542 /app I/pybridge: Dev server connecting ws://192.168.34.103:8888/dev...
07-22 12:22:39.687 /app I/pybridge: Dev server connected
Note: If the device is not on the same network, you can use use
adb reverse tcp:8888 tcp:8888anddev="127.0.0.1:8888"
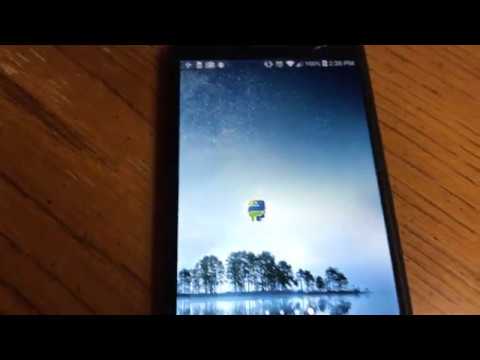
A youtube video of reloading is here:
In server mode, the app hosts a web page with an editor and uses a websocket server to process changes to the code. This is how the playground app works.
To enable server mode:
dev = "server"http://<ip of device>:8888 in your browser (when using a simulator run adb forward tcp:8888 tcp:8888 and use localhost) In this mode the app will start a server that waits for commands from the bridge protocol allowing the apps's python code to be executed remotely while still controlling the app.
You can then use an IDE with a debugger like KDevelop or PyCharm (or android studio with the Python plugins) to breakpoint and step through code.
Start the forwarding service
#: In one shell run
enaml-native start --remote-debugging
Modify your apps enaml-native build.gradle (or edit venv/android/enaml-native/src/build.gradle) to use remote-debugging.
Make sure to set the DEV_REMOTE_DEBUG config var to true and the update the DEV_SERVER address to your system's address.
// Open the android folder in android-studio
// Edit the build.gradle for enaml-native
debug {
    // Set dev remote to true to use the remote debugger
    // must run `enaml-native start` then run your app locally
    buildConfigField "boolean", "DEV_REMOTE_DEBUG", "true"
    buildConfigField "String", "DEV_SERVER", "\"ws://<your-pc-ip>:8888/dev\""
}
Now build in run the app. It will simply sit at the loading screen.
#: Build the app in remote-debugging mode
enaml-native run-android
Modify your apps main.py to use dev='remote' as shown below.
def main():
    """ Called by PyBridge.start()
    """
    from enamlnative.android.app import AndroidApplication
    app = AndroidApplication(
        debug=True,
        dev='remote',
        activity=MainActivity()
    )
    app.start()

# And setup a run hook
if __name__ == '__main__':
    #: This is used when remote debugging
    sys.path.append(os.path.abspath('.'))

    #: Init remote nativehooks implementation
    from enamlnative.core import remotehooks
    remotehooks.init()
    main()
Finally execute the main.py script locally (or use an IDE like PyCharm)!
python main.py
The app runs off your PC but controls the phone as if it were running on the device!
You can profile using standard cProfile builtin to python. Usage is the same. See https://docs.python.org/2/library/profile.html
One of the great things about using the bridge is being able to get a complete trace of everything that was happening. To enable this set app.debug = True and rebuild the app. It will generate a nice trace of all bridge methods and callbacks.
07-22 12:01:55.014 /app I/pybridge: ======== Py <-- Native ======
07-22 12:01:55.015 /app I/pybridge: ['event', [0, 111, 'onPageScrollStateChanged', [['java.lang.Integer', 2]]]]
07-22 12:01:55.015 /app I/pybridge: ['event', [0, 111, 'onPageSelected', [['java.lang.Integer', 0]]]]
07-22 12:01:55.015 /app I/pybridge: ['event', [0, 114, 'onTabUnselected', [['android.support.design.widget.TabLayout.Tab', 'android.support.design.widget.TabLayout$Tab@6c6e5d4']]]]
07-22 12:01:55.015 /app I/pybridge: ['event', [45, 804, 'onCreateView', []]]
07-22 12:01:55.015 /app I/pybridge: ===========================
07-22 12:01:55.046 /app I/pybridge: ======== Py --> Native ======
07-22 12:01:55.047 /app I/pybridge: ('c', (838, u'android.widget.ScrollView', [('android.content.Context', ExtType(code=1, data='\xff'))]))
07-22 12:01:55.047 /app I/pybridge: ('c', (839, u'android.widget.LinearLayout', [('android.content.Context', ExtType(code=1, data='\xff'))]))
07-22 12:01:55.047 /app I/pybridge: ('m', (839, 0, 'setOrientation', [('int', 1)]))
07-22 12:01:55.048 /app I/pybridge: ('c', (840, u'android.support.v7.widget.CardView', [('android.content.Context', ExtType(code=1, data='\xff'))]))
07-22 12:01:55.048 /app I/pybridge: ('m', (840, 0, 'setPadding', [('int', 60), ('int', 60), ('int', 60), ('int', 60)]))
07-22 12:01:55.048 /app I/pybridge: ('c', (841, u'android.view.ViewGroup$MarginLayoutParams', [('int', -1), ('int', -1)]))
07-22 12:01:55.048 /app I/pybridge: ('m', (840, 0, 'setLayoutParams', [('android.view.ViewGroup$LayoutParams', ExtType(code=1, data='\xcd\x03I'))]))
07-22 12:01:55.049 /app I/pybridge: ('m', (841, 0, 'setMargins', [('int', 30), ('int', 30), ('int', 30), ('int', 30)]))
07-22 12:01:55.049 /app I/pybridge: ('m', (840, 0, 'setContentPadding', [('int', 30), ('int', 30), ('int', 30), ('int', 30)]))
07-22 12:01:55.049 /app I/pybridge: ('c', (842, u'android.widget.LinearLayout', [('android.content.Context', ExtType(code=1, data='\xff'))]))
07-22 12:01:55.049 /app I/pybridge: ('m', (842, 0, 'setOrientation', [('int', 1)]))
07-22 12:01:55.049 /app I/pybridge: ('c', (843, u'android.widget.TextView', [('android.content.Context', ExtType(code=1, data='\xff'))]))
07-22 12:01:55.049 /app I/pybridge: ('m', (843, 0, 'setTextKeepState', [('java.lang.CharSequence', u'Chapter - 1')]))
07-22 12:01:55.049 /app I/pybridge: ('m', (843, 0, 'setTypeface', [('android.graphics.Typeface', u'sans-serif-condensed-light'), ('int', 0)]))
07-22 12:01:55.049 /app I/pybridge: ('m', (843, 0, 'setTextSize', [('float', 18.0)]))
...
07-22 12:01:55.051 /app I/pybridge: ('r', (45, ('android.view.View', ExtType(code=1, data='\xcd\x03F'))))
07-22 12:01:55.051 /app I/pybridge: ===========================
07-22 12:01:55.087 /app I/pybridge: ======== Py <-- Native ======
07-22 12:01:55.087 /app I/pybridge: ['event', [46, 805, 'onCreateView', []]]
07-22 12:01:55.087 /app I/pybridge: ===========================
If you're working on enaml-native itself or an lib package (eg enaml-native-icons) you can create a symlink for your package's src folder to the app's site-packages.
For example
ln -s /abs/path/to/your-custom-lib/src/yourpackage path/to/apps/venv/android/x86_64/python/site-packages/yourpackage
The build system will then copy it in without having to re-generate and re-install a package