Unfortunately the spindle on my old Dahlgren System 300z engraver didn't work when I got it, this how I fixed it.
There's absolutely nothing about this engraver on the web, and there's no brand or part number on the spindle itself so I had to manually probe each pin and trace pins on the driver card to find the pinout.
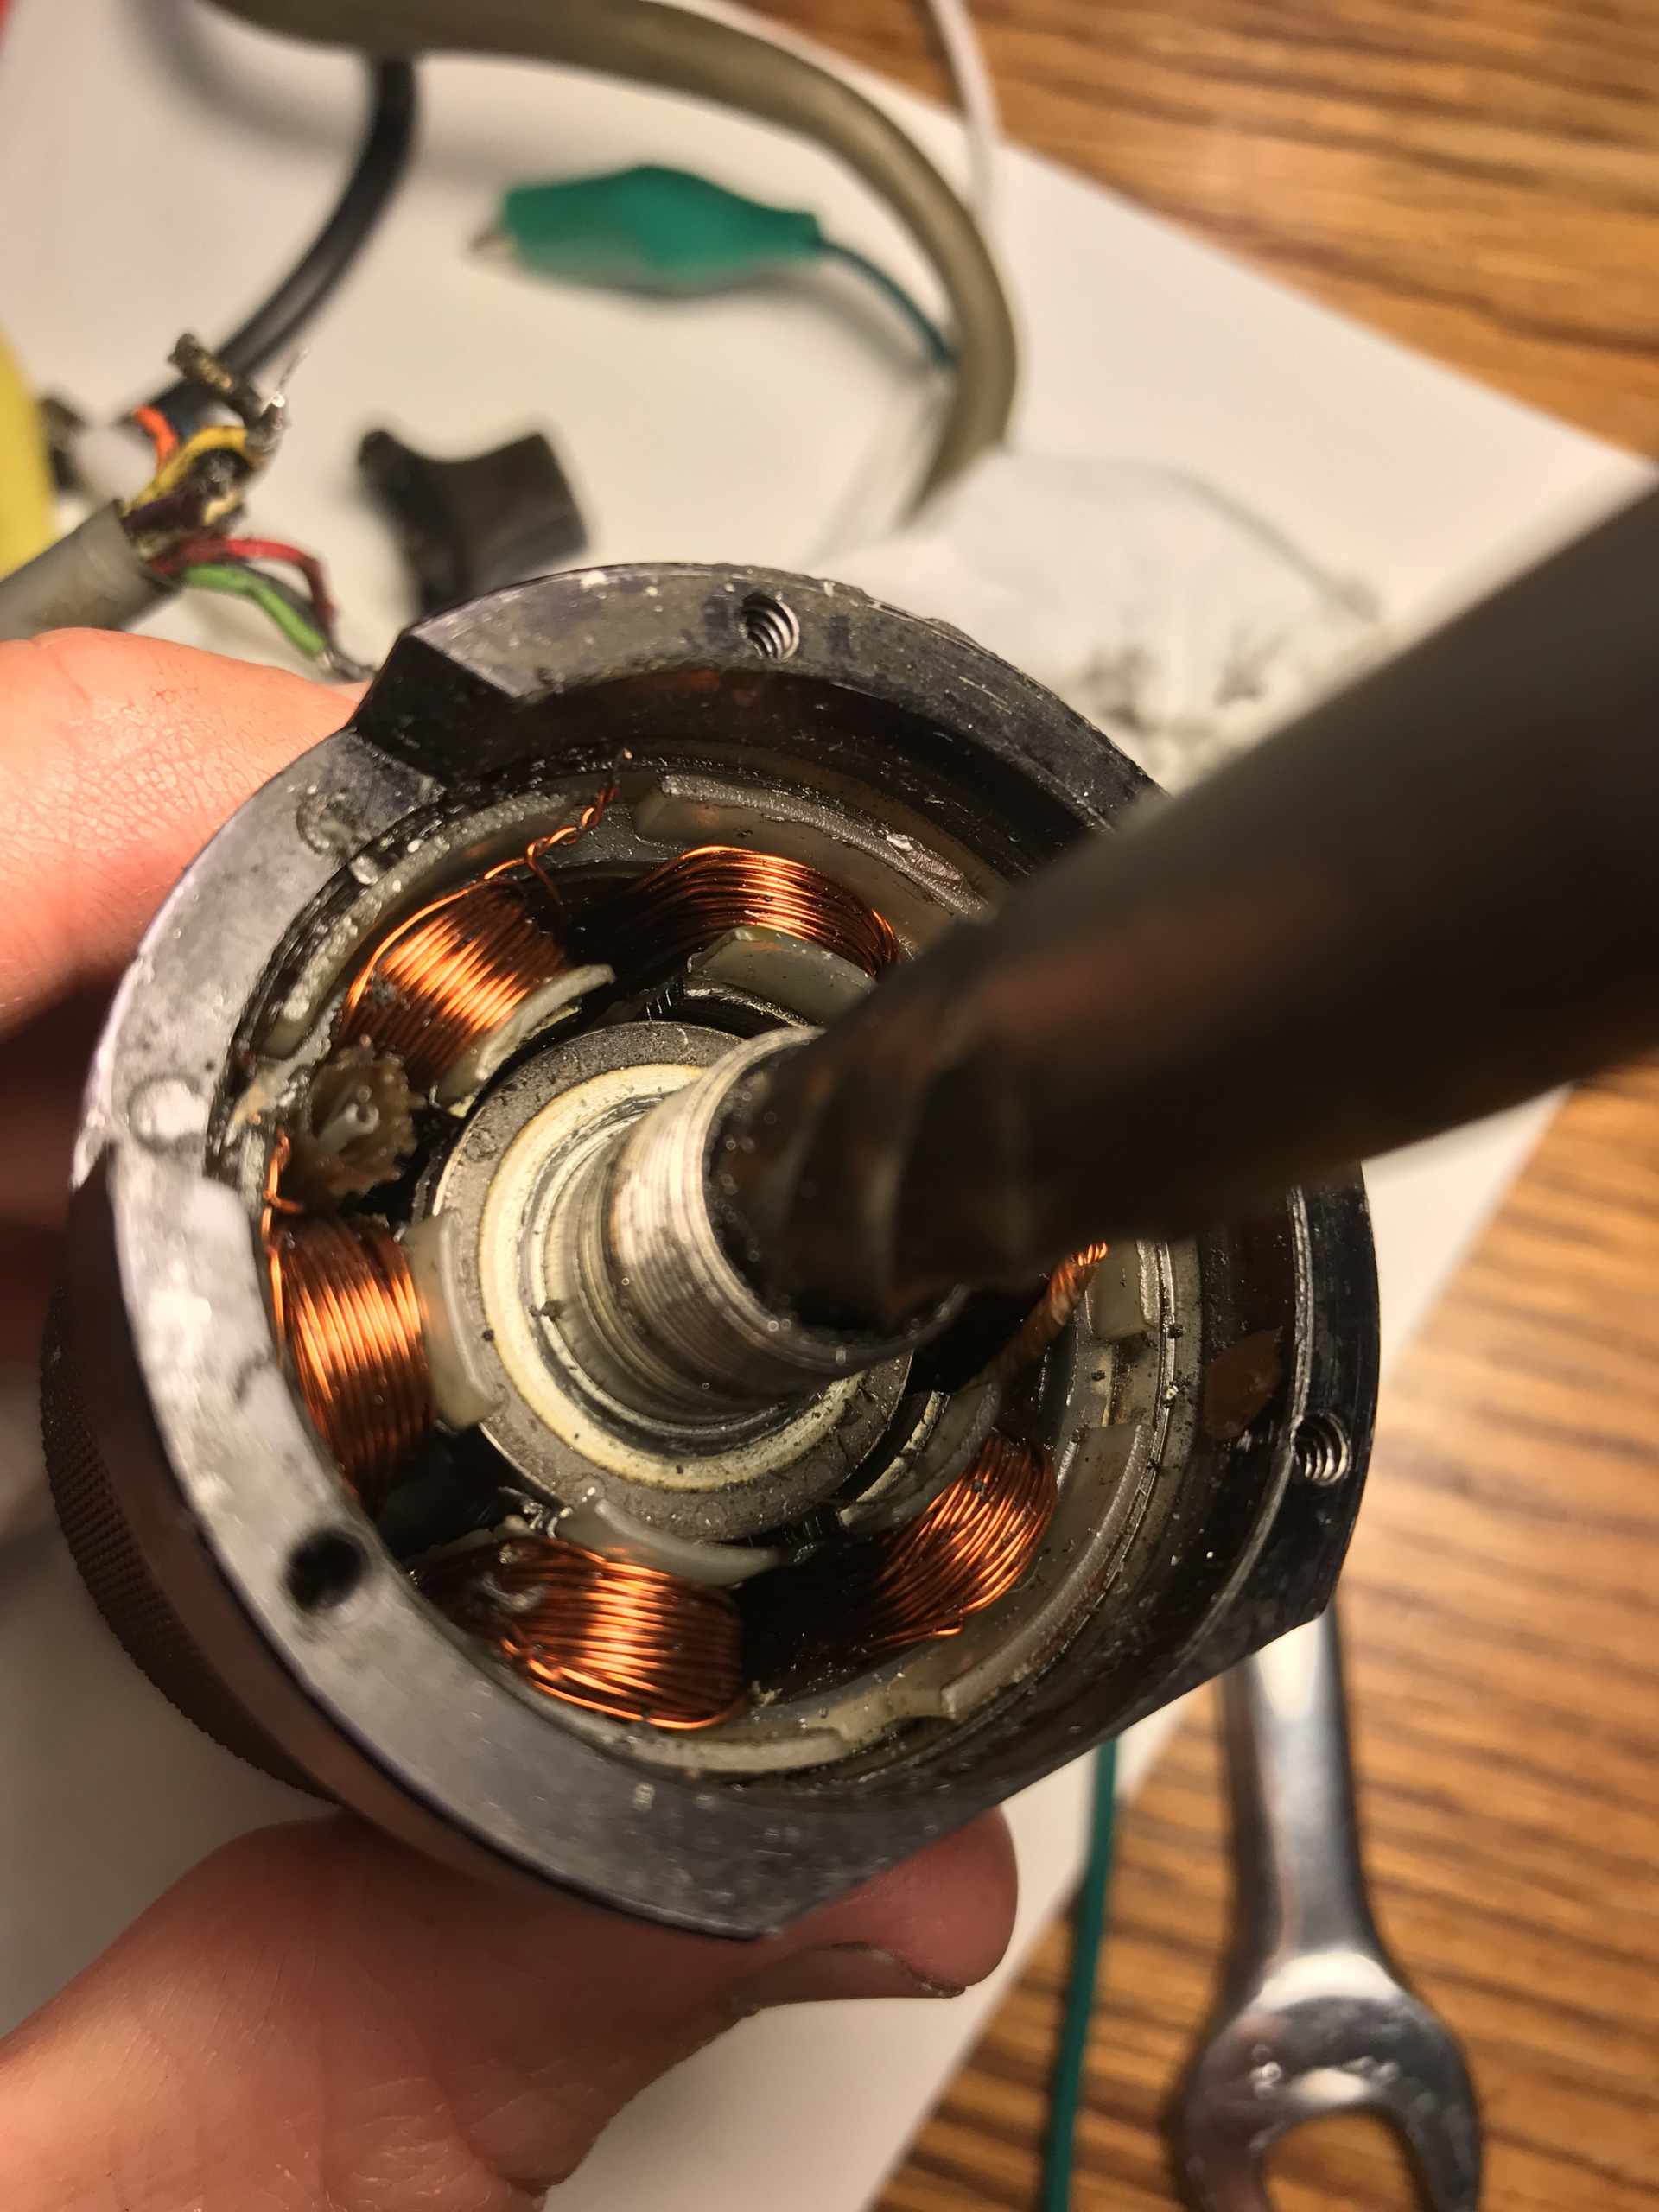
The coils were easy, but I didn't realize until more probing and looking up the part numbers on the driver card that the spindle is a 3-phase BLDC motor with hall effect sensors.
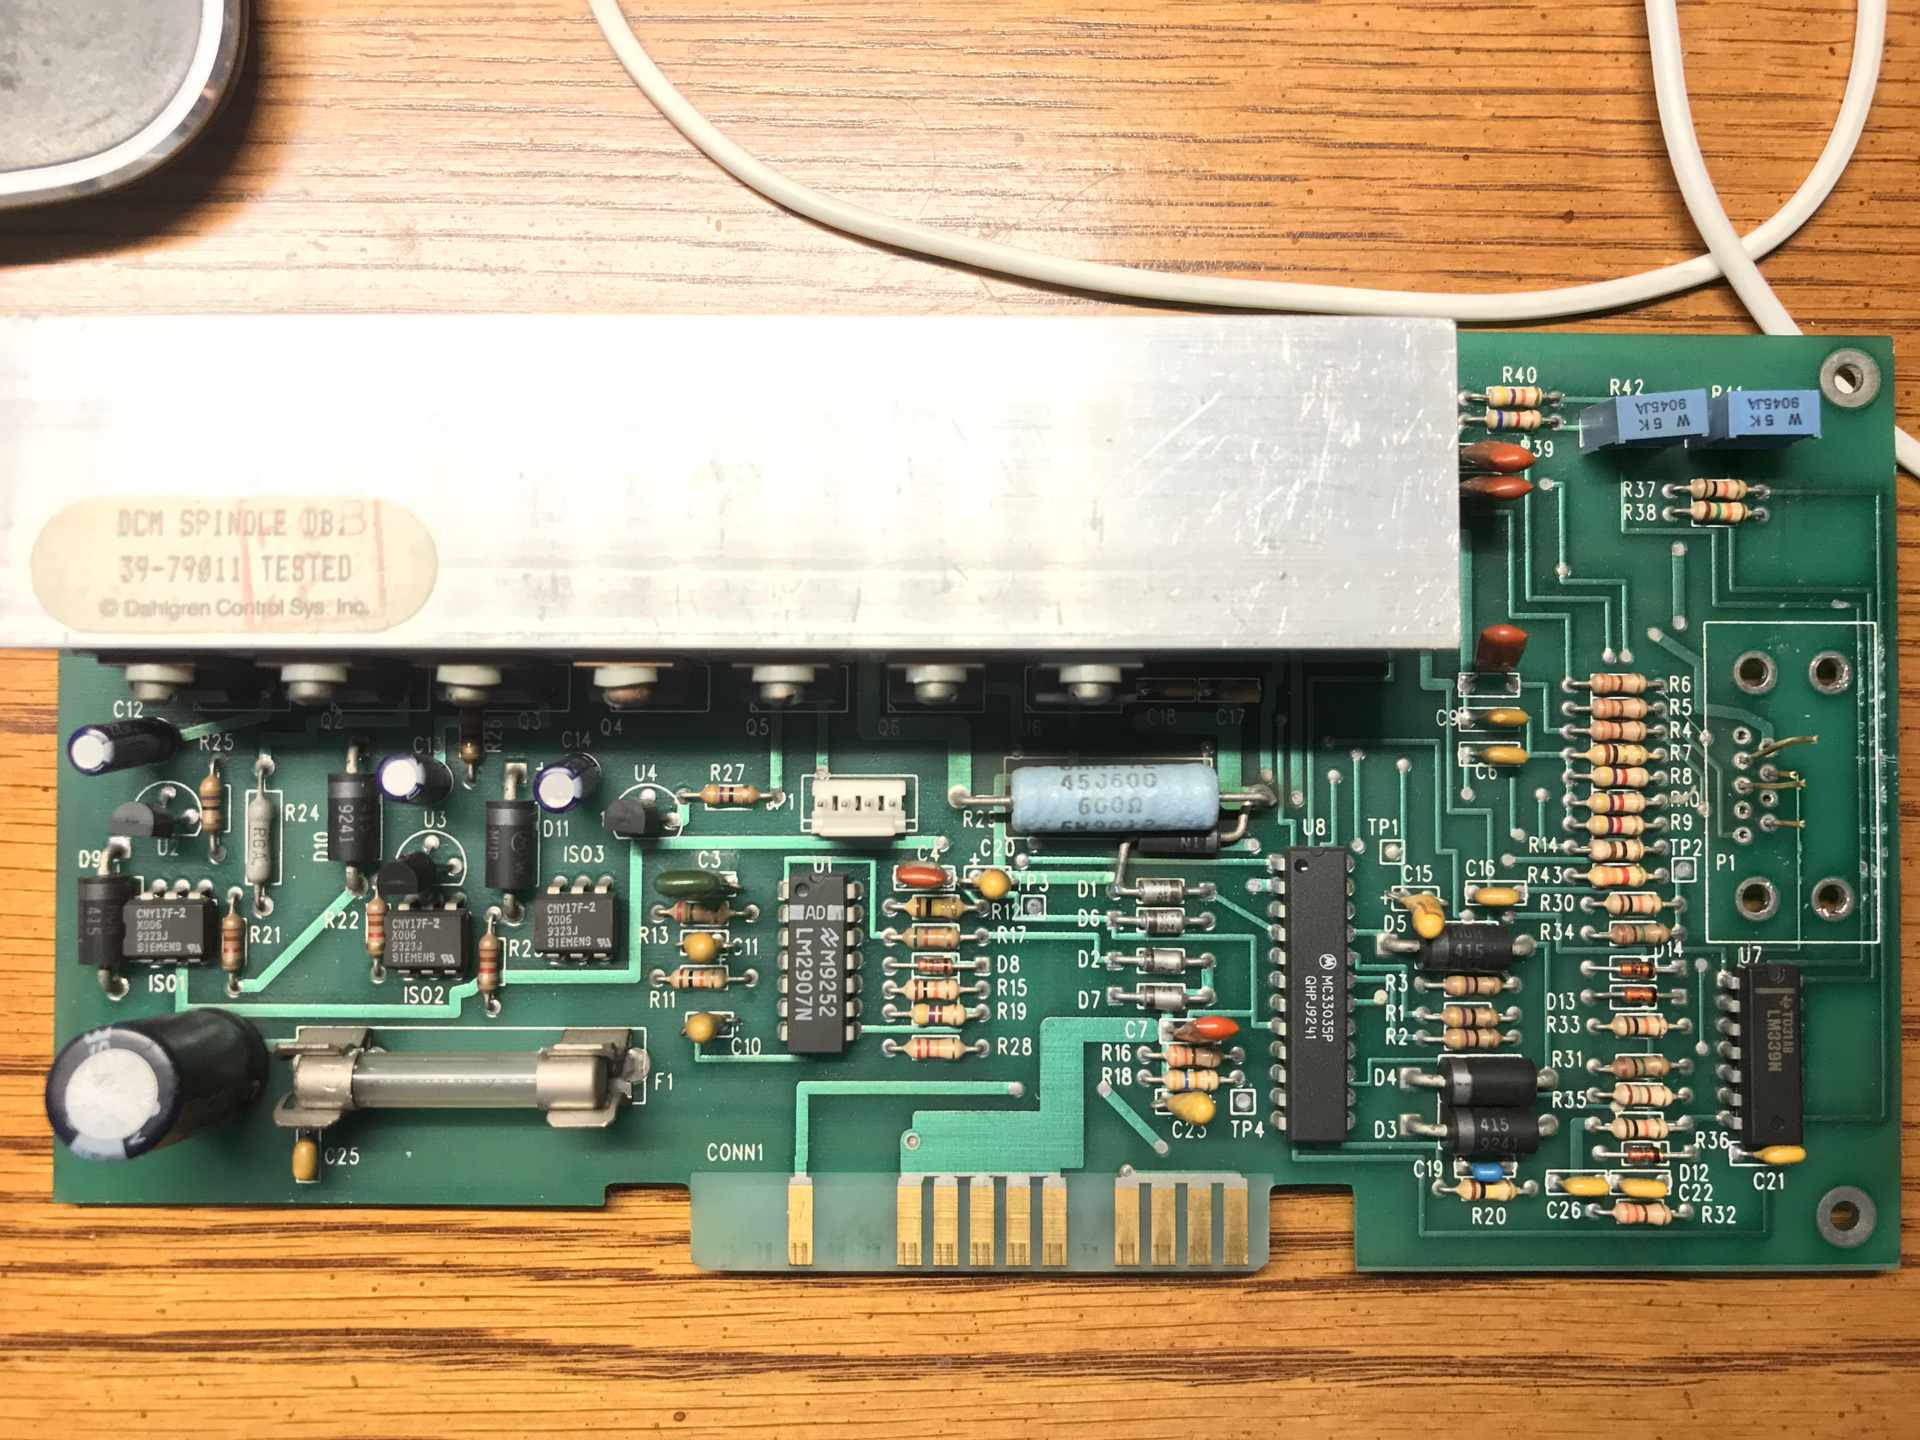
Here's the spindle driver card
BLDC motors are driven much differently than steppers. I couldn't find any off the shelf breakout boards like there are for steppers so decided to put together my own.
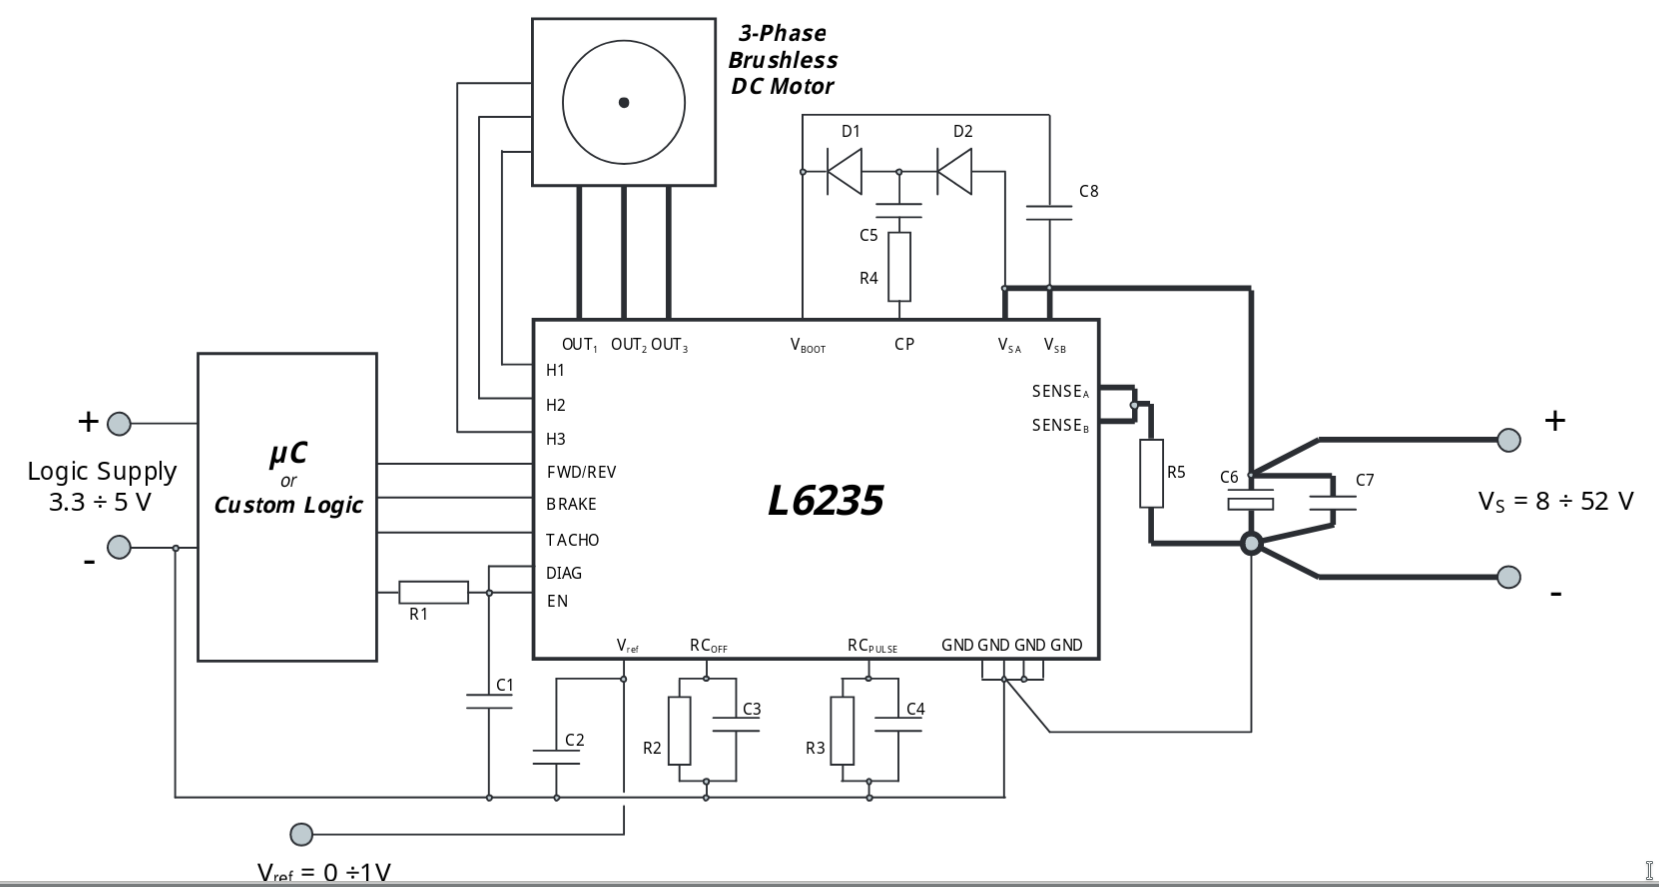
After a lot of searching, I settled on the L6235 driver from ST, it has a decent current output 2.8A rms and can handle up to 52v. It will also save you if you short the outputs or stall the motor!
Here's the application diagram
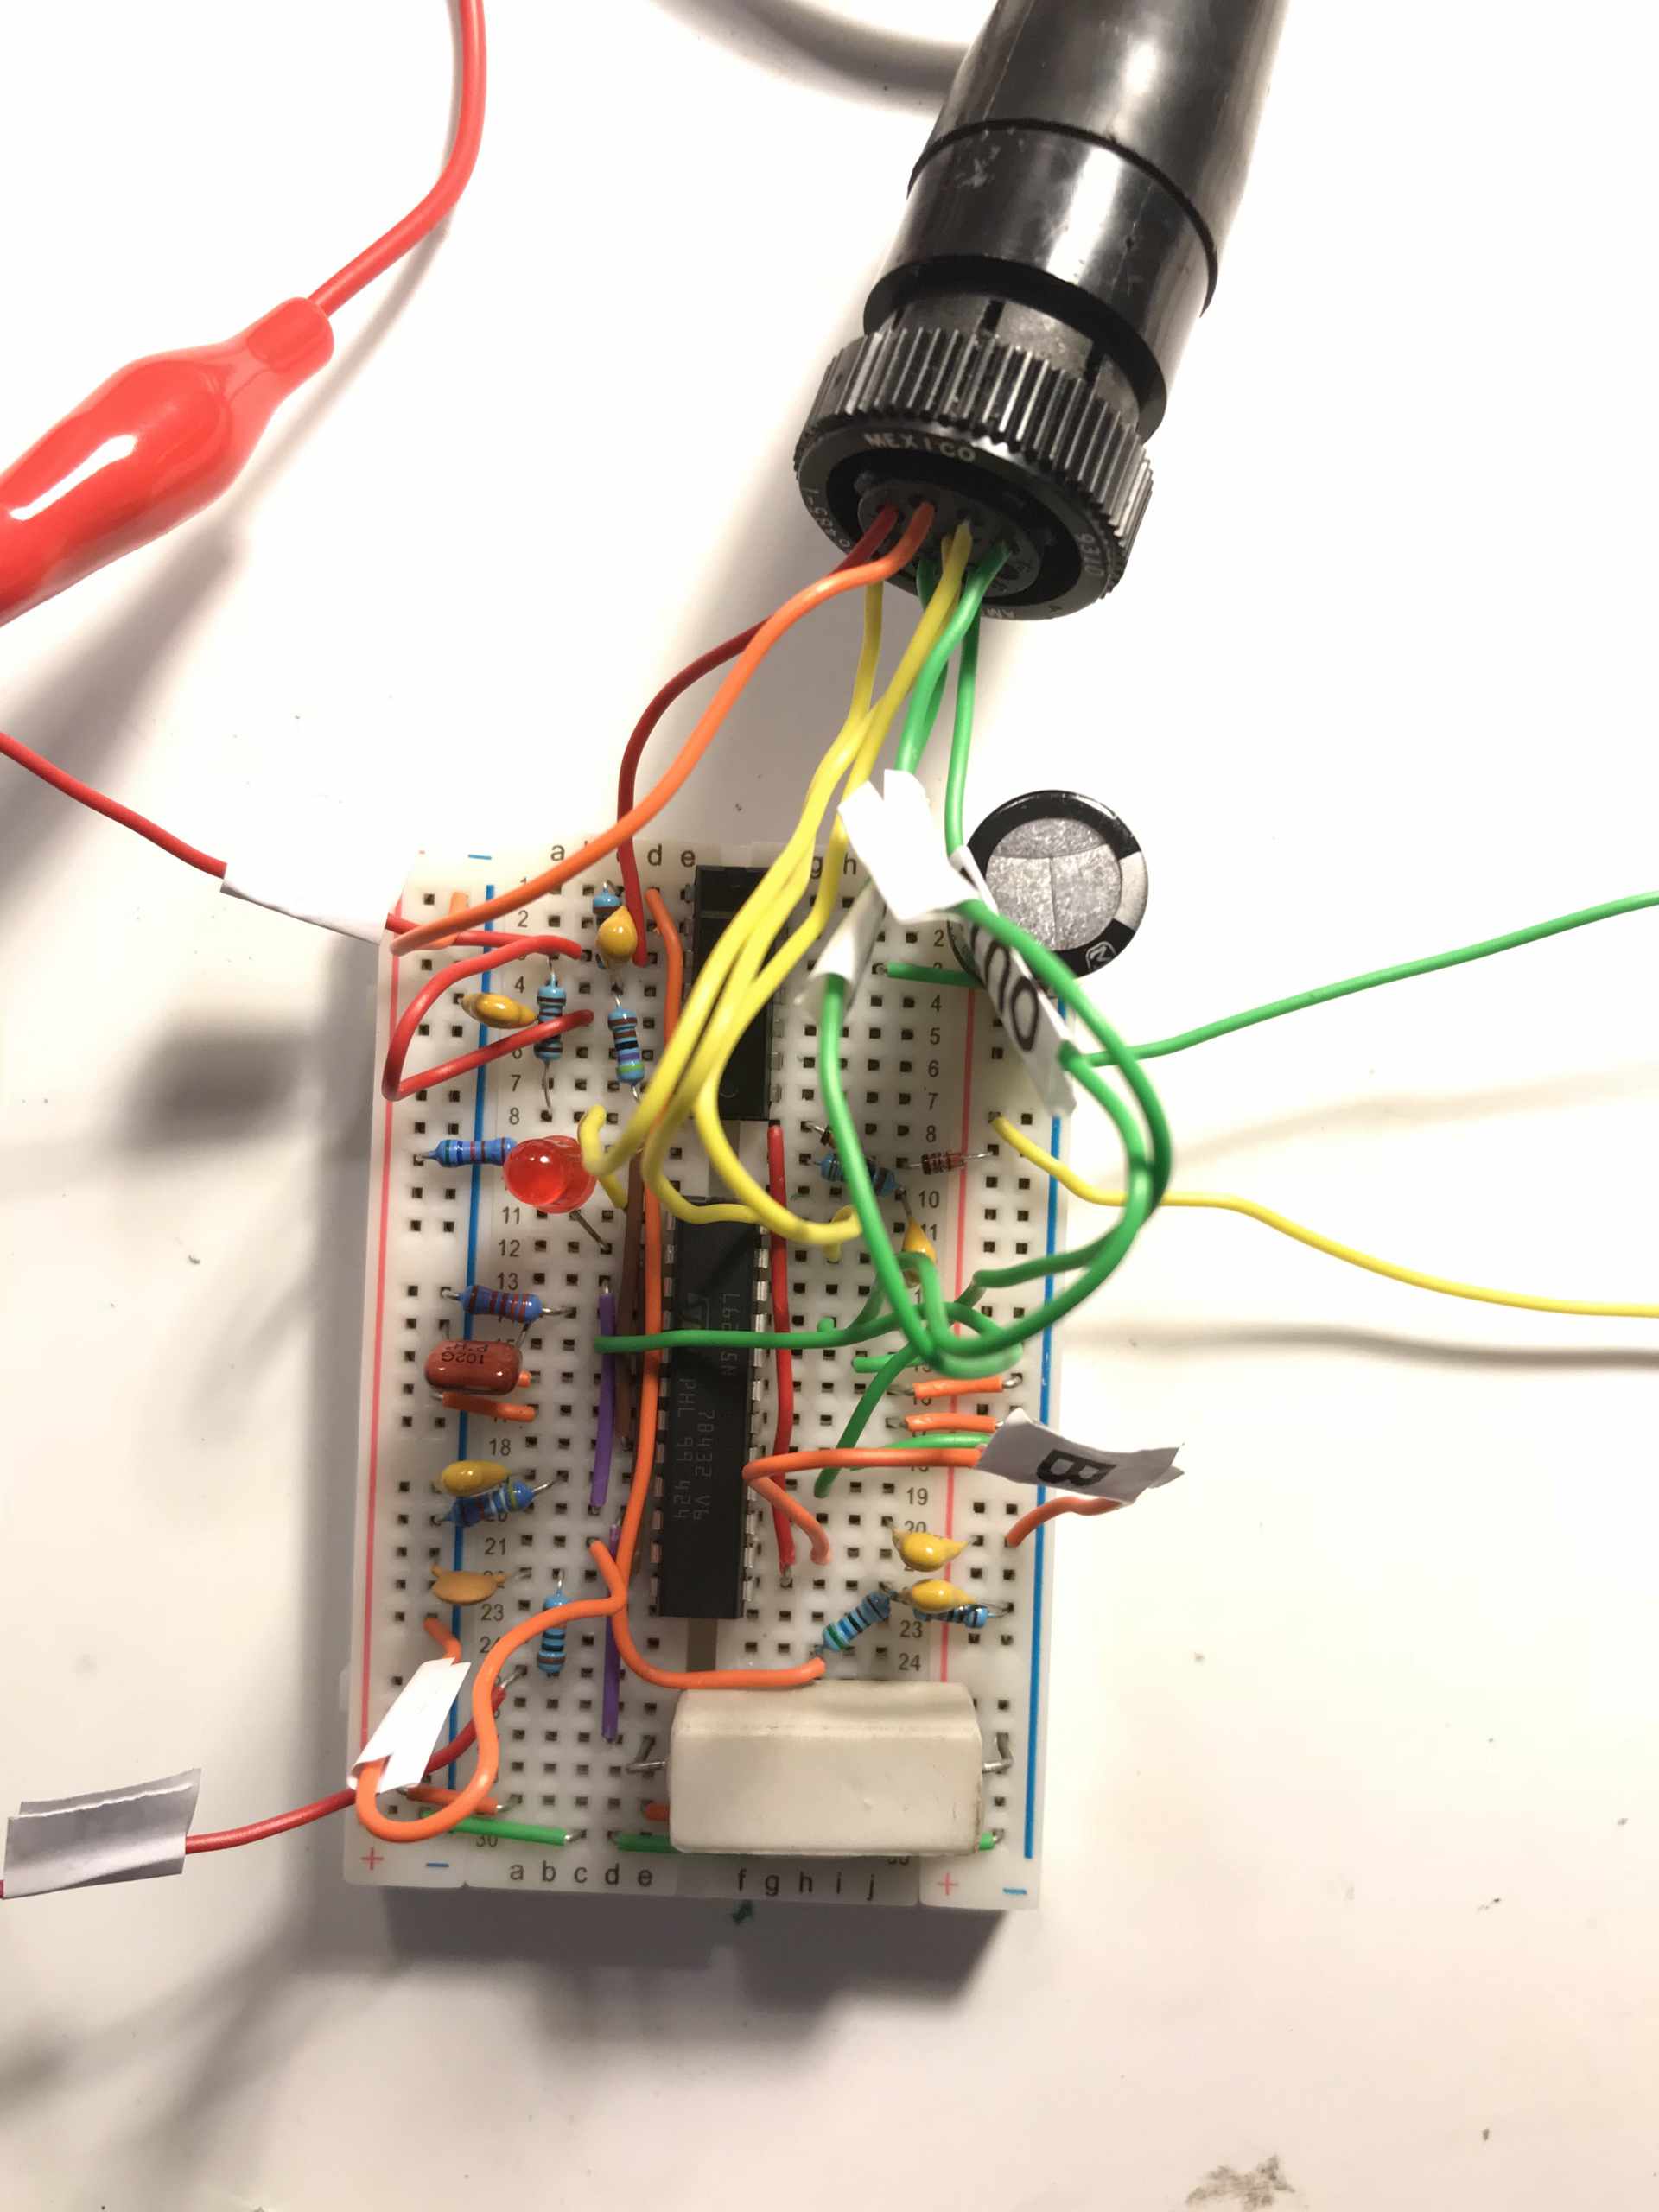
So I threw that together on a breadboard and wired it all up and... nothing! Didn't work (well I did blow a cap that was in the wrong place). So back to more debugging...
After tripple checking everything, having my brother check the circuit, and data sheet, etc... I decided to trace each hall sensor to make sure they were working.
Two of the three were reading correctly, triggering between 0v and 5v. The other was reading just a flat 15k ohms, no change in output when the motor was manually turned.
So we had to take apart the spindle and replace all the hall sensors. What a major pain! Here's a picture of the sensors that are replaced now
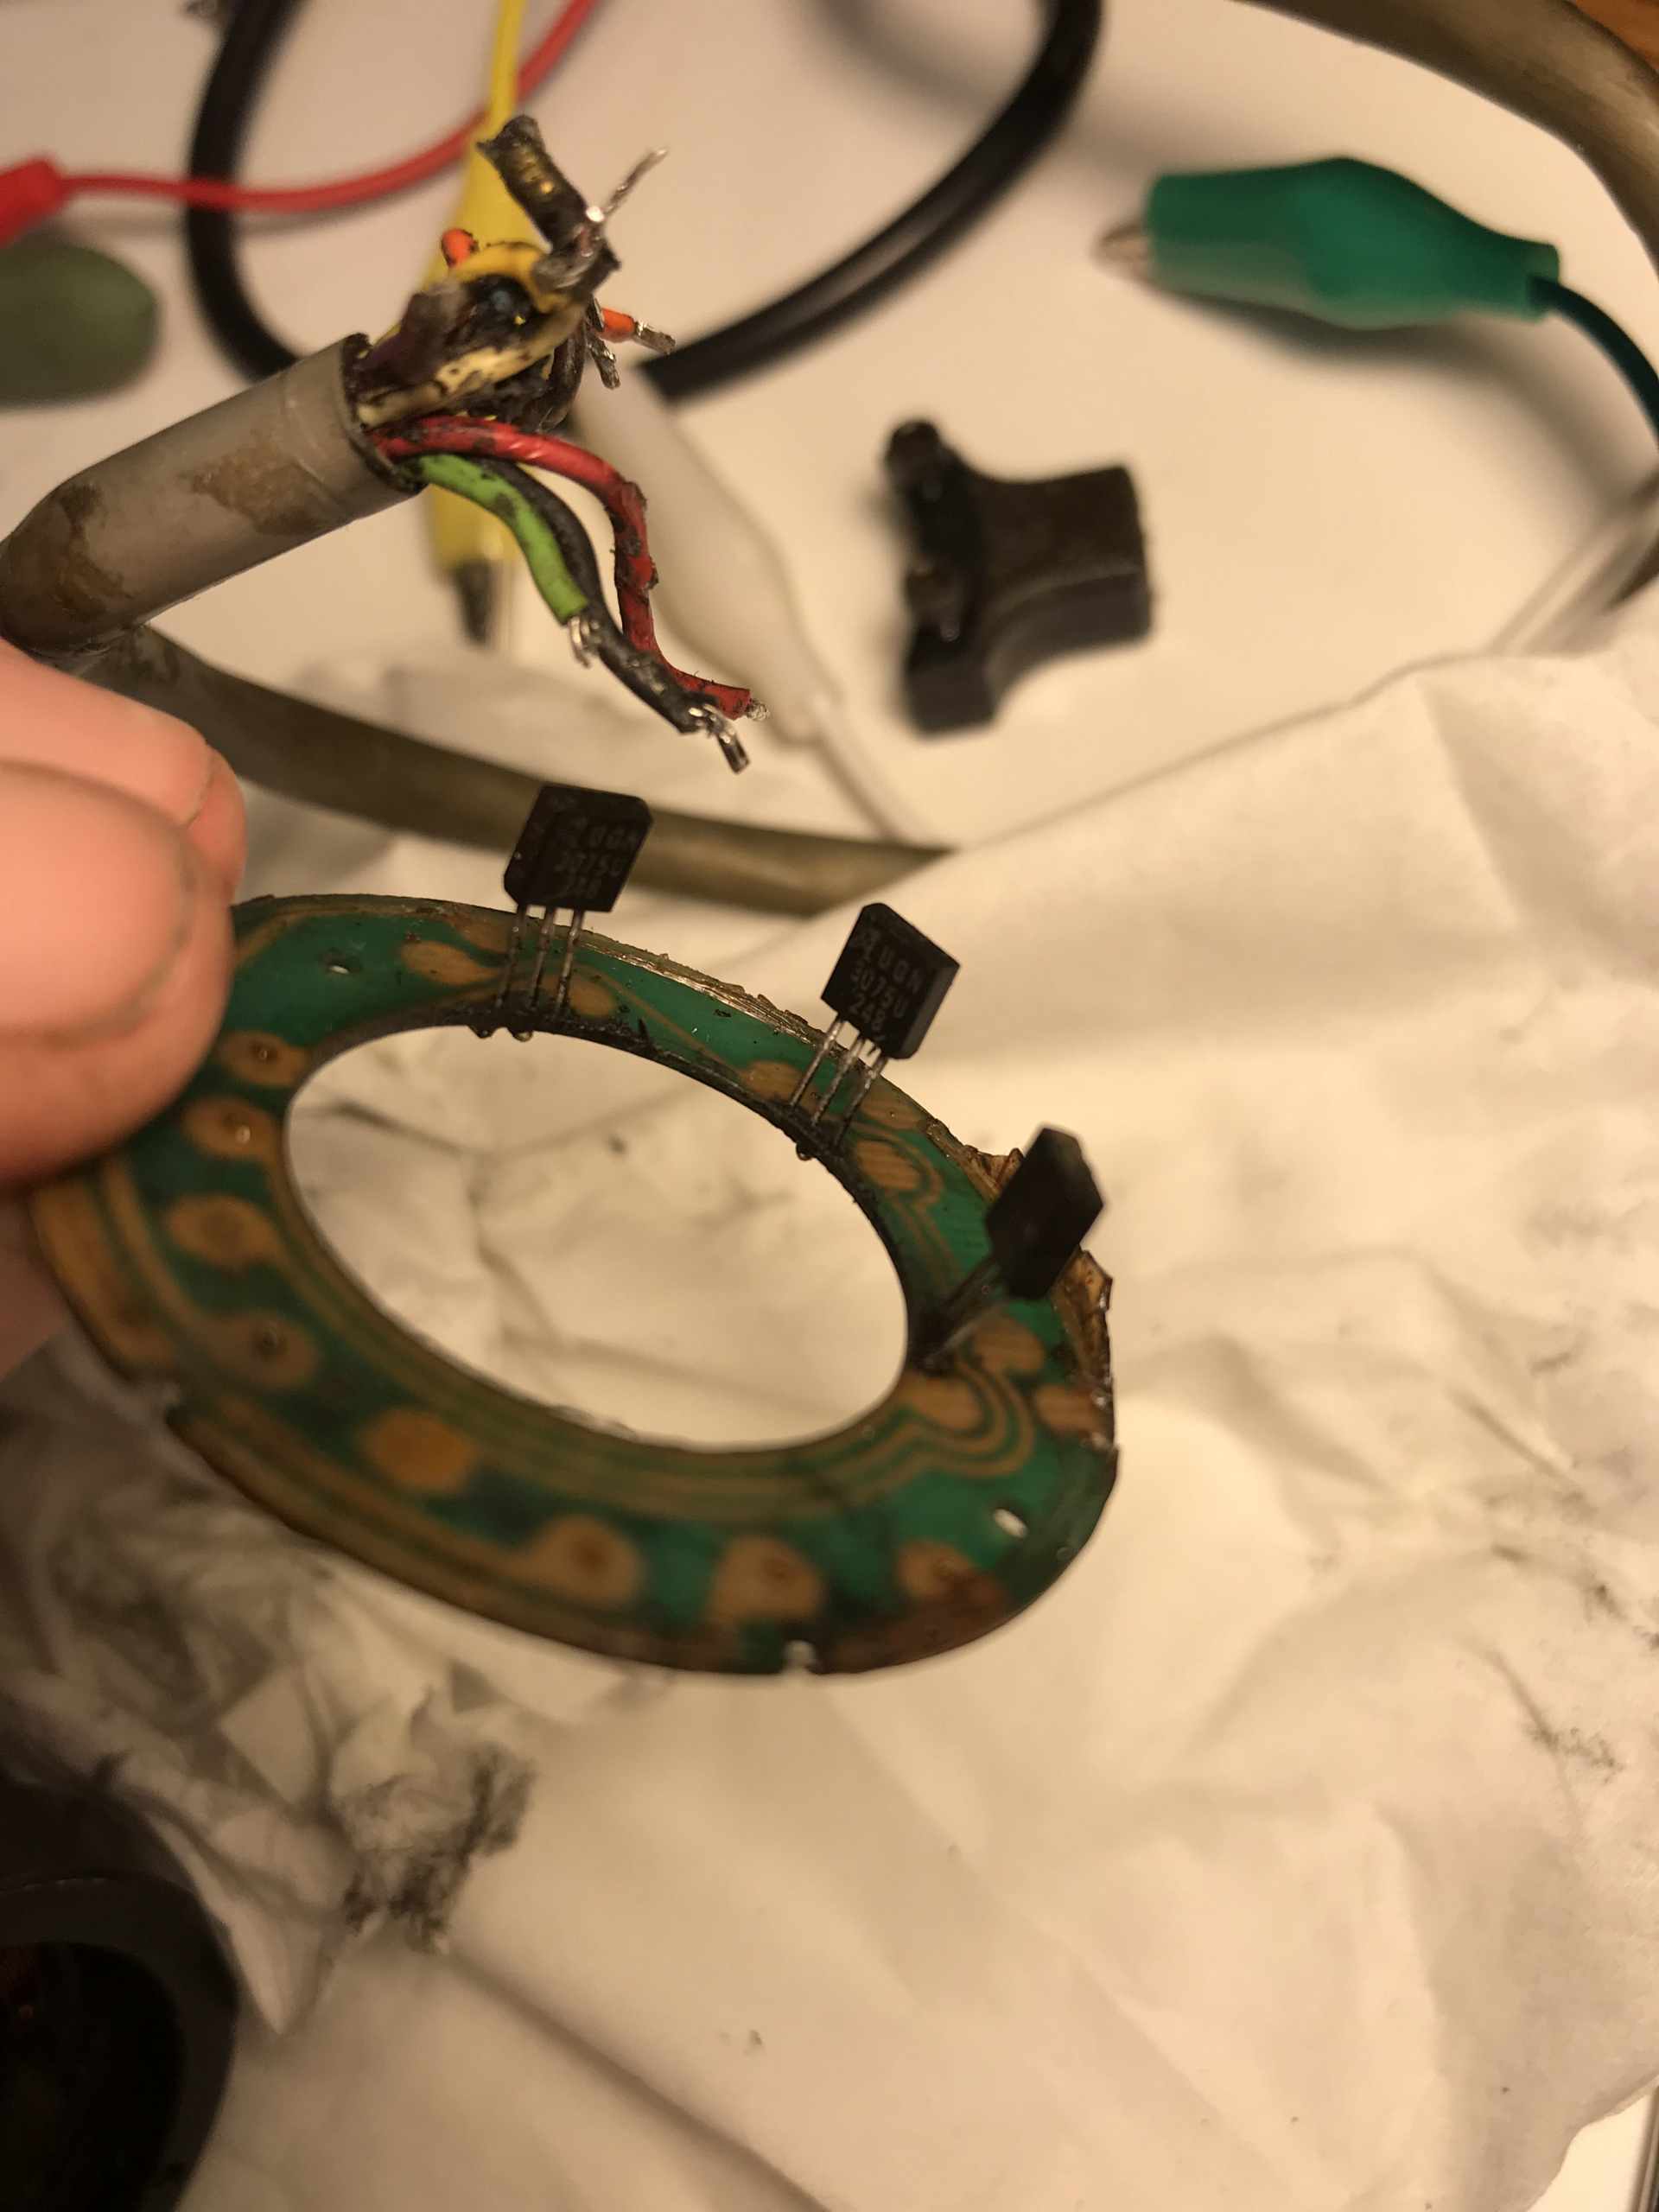
The wires were so brittle they broke off when desoldering the board. Solding them back on was a disaster because of the coating. I don't know how well the solder will hold heat under load, time will tell.
After getting it back together and checking for shorts everything checked out, all the hall sesnors were reading correctly now.
Plugged it back in and bingo, well not quite. I had my wires switched and it was just rocking back and forth. Correct that and a problem with my speed controller and it worked!
It was only using a 12v ATX supply so the RPM was pretty low.
It works better at 24v and I'm sure once I switch to a 48v supply it'll be faster yet (I believe the original card was 50V).
That's all for now. Next post will be a demo and software changes needed.